Friday, August 8, 2014

Blessing outfits and blessings

When it came time to make Magnus' blessing outfit I did what anyone my age would do, I went to Pinterest. I also went to my stash of vintage patterns because I like to dress my kids in old fashioned clothes. 
This pattern was acquired at a Relief Society activity at the "give and take" table. There was a fairly large box of old patterns. I decided it would be a bad idea to take the whole box so I limited myself to a few. I love the look of kids in overalls and rompers. I think it's a limited time sort of thing so you have to jump in and do it before it's too late. 
I loved the look of this romper on Etsy so I looked for a way to combine the two sources of inspiration. I went to the fabric store and looked at all their white fabric. I wanted there to be interest and I decided the interest would come via texture. 
I used cotton sateen for the "shirt" and seersucker for the overalls. I altered the shirt pattern down to Magnus' size and then altered it further into a onesie. It worked but it didn't work at the same time. It didn't cover his diaper but, the overalls covered most everything else!
I altered the pattern for the overalls down to Magnus' size and then I made the bottom section a little longer. The original pattern was almost like a skirt with the centers connected, I wanted more defined shorts. I added snaps to the onesie and overalls for ease in dressing and diaper changes. 
I took some pictures a few days after because I realized we only had pictures of our family. 

Last week I had the opportunity to make something very special, a burial outfit. My wonderful sister gave birth to twins last month at 32 weeks. They were mono mono twins which necessitated hospitalized monitoring for the last month and a half of my sister's pregnancy. It was known that one of the twins, Cooper, had a heart defect that would require open heart surgery. Two weeks after their miraculous birth, Cooper passed away in his parent's arms. They brought him to Utah for burial. 

I didn't know what to say or do to help my sister so I offered up my skills. Without a set of measurements I did the only thing I could do, I prayed. After I prayed I went to work. I had a few mason jars on my sewing table that I used for sizing. I scaled down Magnus' blessing outfit pattern and hoped it would fit Cooper. I combined pattern elements into a new outfit that I hoped Hilary would like. After I finished patterning I used the rest of the cotton sateen. It was so soft and pliable. The outfit came together quickly, I had this much done by 10:30 that evening. 
I snagged one of Mina's dolls for a fitting. James suggested adding Velcro up the back seam for ease in dressing. I hadn't thought about that and I appreciated his input. 
The combination of functional buttons in the front and Velcro in the back made it easier to dress. 
I added buttons and waist tabs to the romper. Later on I added a satin bow tie that I made from Hilary's wedding dress sash. I'm glad I was able to help in some small way. 

The outfit fit perfectly. 


Sunday, June 15, 2014

Disney stuff

My last few projects have had something in common: Disney characters. Two of my nephews requested costumes based on some of their favorite movies, "Frozen" and "Toy Story." 

First up, "Frozen" and the "Kristoff dress."
My nephew Parker turned three a couple of months ago. While we were Facetiming he asked if I could make a "Kristoff dress" for him. I had no idea what he was talking about so I asked my sister, Hilary, to translate. She explained that he wanted a Kristoff costume because his sister had one of Anna or Elsa (I still haven't seen the movie.) Anyway, I told him I could and I arranged for Hil to take Parker's measurements. 

I looked at several images and took a guess on the colors. It is CRAZY how different the character looks throughout the pictures online. I drafted the patterns, bought my supplies and started sewing. 
I had been debating over adding fur because I couldn't find what I needed on the trim section. I finally bought some faux fur and cut it apart into trim. Our front room and craft room looked like I had killed a stuffed animal. I think the mess was worth the final product:
The costume was comprised of five pieces: undershirt, tunic, pants, belt and boots. Nope, six pieces, there was a hat as well. 
Here is Parker in his costume! I think his smile says it all. 

My other Disney project started out as two full costumes for my nephew's trip to Disneyland. My sister-in-law, Candice, asked if I could make a Buzz Lightyear and a Woody the cowboy costume for her son. I agreed and started sketching. As I was sketching I realized that their trip was going to be the first week of June and it gets HOT in California. We discussed it and she suggested making casual shirts instead. She saw a picture on Pinterest of some "Princess play clothes" and suggested something similar. It was a genius idea and I had a lot of fun with the new approach. 

I made the Woody shirt and vest first. I drafted the pattern off of my nephew's measurements and bought the fabric. It was later that I realized that Woody's shirt has a grid pattern on it. I had plain yellow cotton. What was I going to do? I saw a tutorial on Delia Creates using Sharpie's new fabric markers. Bingo. I bought a pack at Staples and added the grid pattern to the yellow fabric. (Funny story: As I was looking for the markers I was trying to wrangle Mina. When I found the markers I said, "Awesome!" because I was so relieved. Right after that I heard Mina mimic me with a little, "Awesome!" of her own. She sounded like Cecily Strong from SNL.)
I used the red Sharpie on the shirt and the black Sharpie on the vest. I purchased the neck tie because it was 99 cents at Hobby Lobby. 
I was pretty happy with the results. Plus, it was a really inexpensive project!

The Buzz Lightyear shirt was a little more challenging. I wasn't sure if I wanted to make a padded shirt over a tee shirt or appliqué a tee shirt. In the end I appliquéd a tee shirt because a padded shirt seemed like a heat stroke waiting to happen. I used pieces of felt and fleece to make the design on the shirt. I left the sides undecorated so there was still some "stretch" in the shirt. 
And the back:

Next up, Magnus' nursery decor and his blessing outfit. We are still deciding if he is going to be blessed in July or August. We need to make that decision and I need to get sewing!

Monday, April 21, 2014

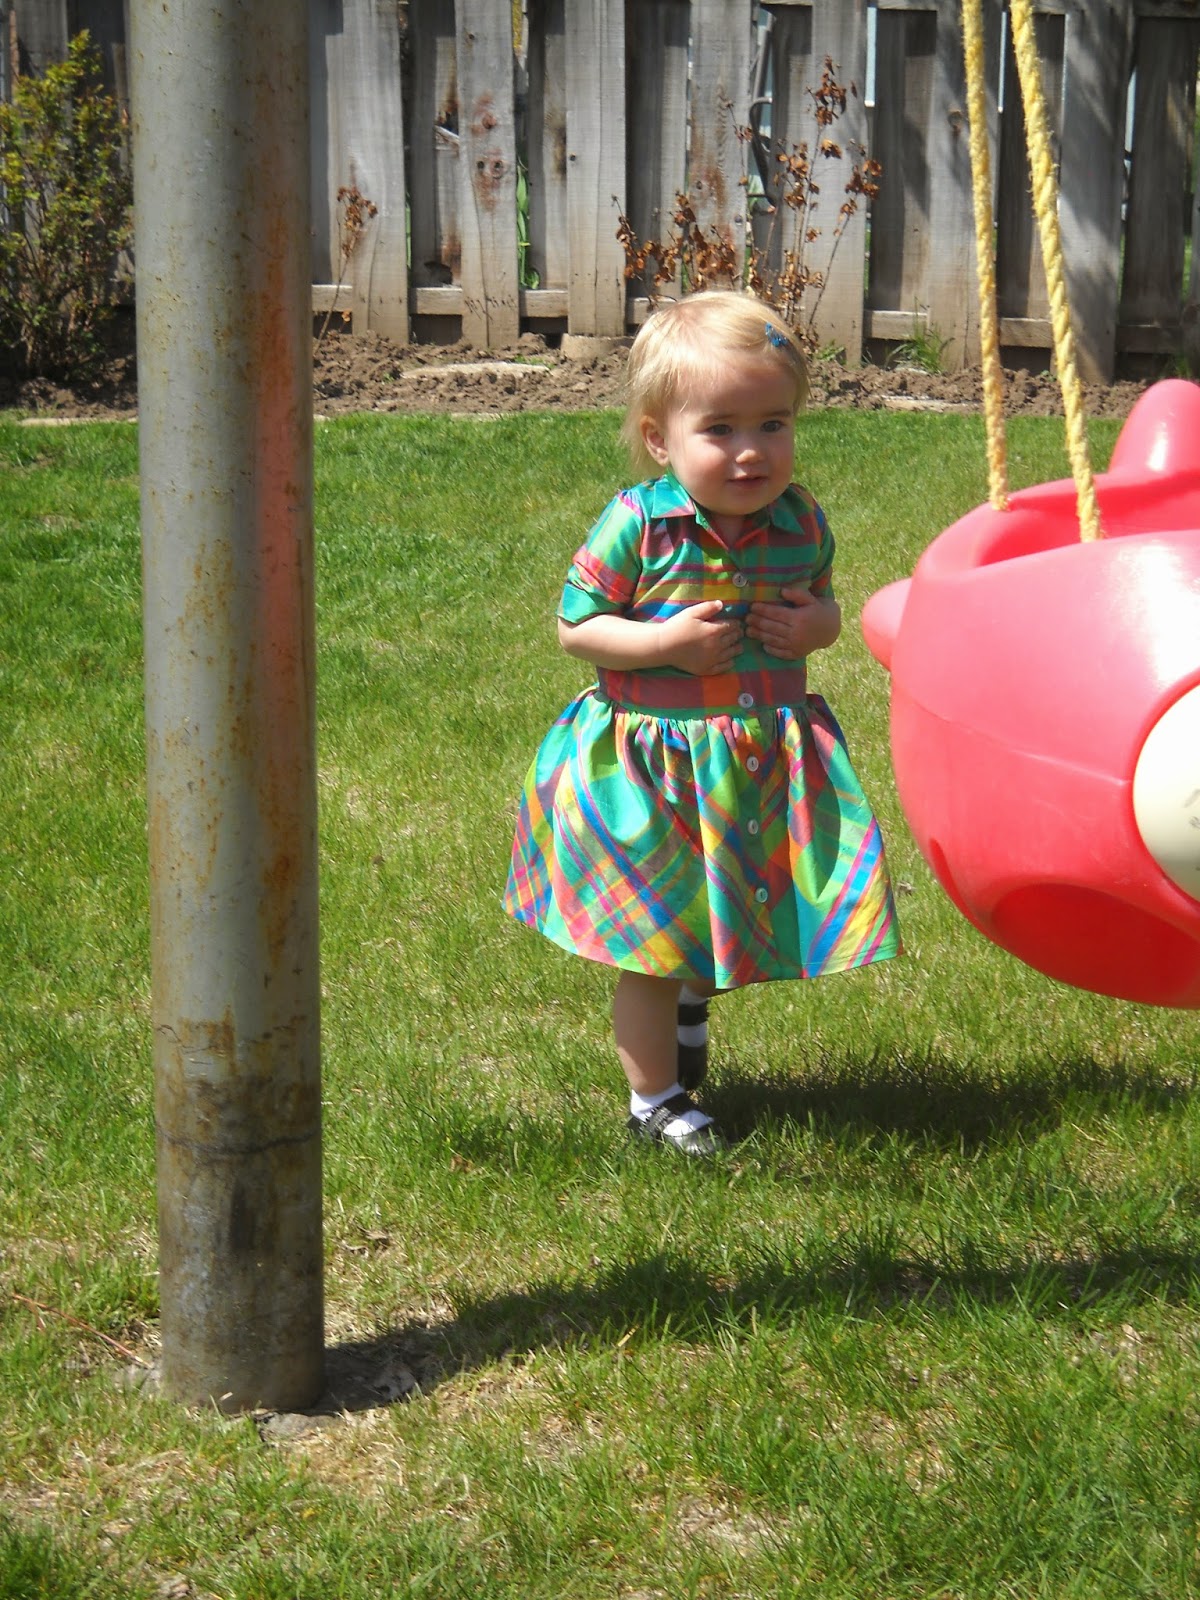
Mina's Easter dress!

Last year I made two Easter dresses for Mina AND a bonnet.  This year I unintentionally kept up the two dress tradition but only one is actually useful.

As with all of my projects I started out with a few sketches.  I had a few ideas that turned into three dress designs.
Then I did what any modern person would do, I posted the picture on Instagram and asked for opinions. The first and third dresses were pretty similar to dresses I had designed in the past.  I think that is why the shirt dress got the most votes.

It had been a little while since I had built something for Mina so I took her measurements and made a sloper.  I'm glad I did because it was kind of messed up.  It really didn't help that she was so wiggly when I was trying to fit her!

I made the pattern, serged the pieces and was feeling pretty good about my progress.
 I felt so good that I put the button holes in and sewed buttons.
 It didn't fit.  The shoulder seams were in the wrong place, the sleeves were oddly tight, the collar wasn't the right size, the skirt wasn't full enough and the lapel wasn't laying flat.  It was not a happy thing to discover on Thursday night.

I had a Stake training for Primary so I held off on the alterations until Friday.  I wanted to sleep on it and decide how to proceed in the morning.  I altered the pattern and cut out the new dress during Mina's nap time.  Some how I had this much done by Friday night:
I waited to open the last button hole until I tried the dress on Mina.  I wasn't sure about the length and I was pretty gun shy after the first disaster.  Luckily it fit and after a very busy Saturday I had it ready before I went to bed.

I even had time to make chocolate covered peanut butter eggs!  
Sure, they aren't pretty but since when does CHOCOLATE need to be overly pretty?

 Easter morning rolled around and Mina seemed pretty happy to find her basket.


I didn't get a decent picture before church so I put a bib on Mina and hoped she would leave it on during nursery.  Imagine my delight when I saw that SHE KEPT IT ON! HER DRESS WAS NOT COVERED IN NURSERY TREATS!

Then it was time to attempt to take a decent picture of Mina in her dress.
She would not hold still.
Or smile.
Or look at me.
 Or hold still.
So, I asked James to entertain her.


She was smiling at James who was playing with her swing.

Our little girl is growing up entirely too fast.


Wednesday, February 26, 2014

The last few months

And once again I am updating a few months' worth of projects on my neglected blog. Is it really neglected if no one reads it? 
I made another coat for Mina because the first one was too narrow for multiple layers or even a sweater underneath. I decided to use box pleats to get enough room in the body of the coat. I love the bright turquoise lining and the way it peaks out when the coat moves. 
Mina wore it without closures for a while. I wasn't sure what to use or the color to choose because of the coat's color. In the end I used some silver filigree buttons. 
Excuse the funny red cast in the picture, the playground equipment is very bright. 
I fell in love with the cute double collar on a few items in the Fall/Winter Hucklebones collection. I bought a really pretty purple turtleneck at the DI and decided it would be a great dress for Mina. The combination of the double collar and cuffs has lead to a few funny comments at church. Namely, "school marm" and pilgrim. 
I picked up a large piece of light weight dark teal wool at the "give and take" table at Relief Society on night. I loved the color and the fact it wasn't overly scratchy. I used a BabyGap dress as inspiration for the jumper. 
This is actually the second version of the jumper, the first was too narrow and short. I think Mina will be able to wear this one for quite a while. She wore it to her first official day of nursery. 
I made this colonial dress for my friend's daughter. She picked out the pattern and materials. I think it turned out really well. It was a very fun project!
Last up, monkey wings. My Mom's school, Oak Hills, is presenting "The Wizard of Oz" next month. I was asked to create 8 sets of monkey wings for the winged monkeys. I brainstormed a structure for the form and then created a set of prototype wings. Last week I took the wings to rehearsal and luckily, they worked. 
My hands were so sore from clipping all of the curves on the scalloped edges. 16 individual wings means a lot of curves to clip. I made the framework for the wings out of a dry cleaning hanger because that type of hanger is lightweight and it bends well. After that I added the felt wing and stitched them together. I made a harness out of woven elastic, foam core board and Velcro. I glued everything together after that. 
I think it was a success. We'll see how they hold up during rehearsals and performances. 

Monday, December 23, 2013

I'm kind of embarrassed

I'm way behind on blogging about projects.
Here we go...
My Mom's Lucy Wilde costume.  I still haven't seen Despicable Me 2 so I watched the trailer a couple of times and I looked at pictures from the movie. Here is my sketch of the coat and the approximation of the pattern pieces.
 My Mom was hesitant to spray her hair orange so I styled a wig.  I really could have used my friend Molly's expertise with that part!
 Mina the Ewok.  I was pretty happy with the results.  I made little boots but they kept falling off and one got lost. So, pink tennis shoes were her footwear for Halloween.
 I threw my costume together.  The pants were made from stretch denim with ribbon trim on the sides.  I was going to include a side zipper but opted to make them like stretch pants. I figured that my poncho would cover up the waist so I didn't even bother with a waist band.  I was also kind of nervous about how the pants would fit due to pregnancy bloat.  They seemed to work out fine and the poncho covered EVERYTHING!
This next project took a really long time.  It wasn't any more difficult that anything I made before it was just that I felt so rotten.  I had some problems with the lining and the iron. I remedied both by using a larger pressing cloth.  I wound up cutting THREE SLEEVE LININGS for one arm because I melted two of them. In the process I of melting the first one I burned my hand. My patience went out the window during my first trimester.

In the original sketch the sleeves as well as the pockets and yoke were going to be cut from the striped sweater.  I didn't have enough so I used the gray for the hood, sleeves and body of the coat. I painted the toggles black with acrylic paint and added black buttons to the sleeves for decoration. 
Last up, Mina's coat for this winter.  She can still fit in her coat from last year but it's kind of short.  Okay, really short. I took her measurements and started patterning.  I hoped that her wiggles didn't mess up the measurements too much.  

I was inspired to use a double collar after I saw this adorable picture on the Hucklebones website.
The shirt isn't available now but I loved the look of the collar.  I think I'll revisit it for a dress or a cute top.  

 Mina's coat was once a cashmere sweater that I bought for $5 at DownEast in Logan.  I was a poor grad student and I couldn't believe my luck! The sweater bit the dust in the washer so I washed it a few more times and then dried it in the dryer.  I shrunk up nicely and now Mina has a cute new coat.
 It's closer to purple rather than bright magenta.  I'm still working on my photography skills.